The Final Stages Of An Organizing Project….
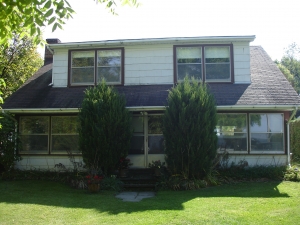
The last two days of this project went extremely well! Firstly, the final refresh of the landscaping made a huge difference to the curb appeal. Check it out, before and after:


With the home decluttered and cleaned, my pre-staging evaluation began. 3 hours later I had reviewed every square foot of the site and made detailed notes on what needed to be done in order to enhance the home for sale with the priorities that would garner my client the biggest bang for his buck. On the day of staging, my assistants and I worked laboriously for 7 hours re-designing and enhancing every room and space in the home. Normally I would be bringing in furniture and other items for staging. However, for this particular project my client’s wish was to use only existing furniture and accessories. On my recommendation, he also authorized a small expenditure for additional decorative items that I felt would enhance the living room and dining room areas. Not a lot of money, but I stretched those dollars to the max! I’ll be posting all the before and after pictures for this project on my gallery in the next few days so be sure to check them out.
 905-642-5669


 905-642-5669


landscaping looks great very clean
i can’t wait to see the staging part.
what type of accessories did you use?
Simply purchased a few decorative pottery items that compliment the existing decor, some placements, flower arrangements, candles, and a fresh floor mat. You don’t always need to spend a lot of money or need to purchase a lot of items. It’s how you use the items that count.
I¡¯m now not certain where you’re getting your information, but good topic. I must spend a while learning much more or figuring out more. Thanks for magnificent info I was looking for this information for my mission.